
Tips for Photographing Glass
by David Rankin
Issue No. 435 - February 2010
Webmaster's NOTE: This article was extracted from Frank Wollenhaupt's column. Frank credited Dave Rankin with the excellent recommendations below.
 1. Don't use a digital camera that was invented at the same
time as the Polaroid – update your camera. – (Not that
many years ago to get a nice digital camera that would give
you 7 to 10 megapixels size photos, you had to spend $700.00
to $1,000.00. Today you can get a camera in this range for
$150.00 to $250.00. Get rid of that old Model "A" and pick
up a sports car).
1. Don't use a digital camera that was invented at the same
time as the Polaroid – update your camera. – (Not that
many years ago to get a nice digital camera that would give
you 7 to 10 megapixels size photos, you had to spend $700.00
to $1,000.00. Today you can get a camera in this range for
$150.00 to $250.00. Get rid of that old Model "A" and pick
up a sports car).
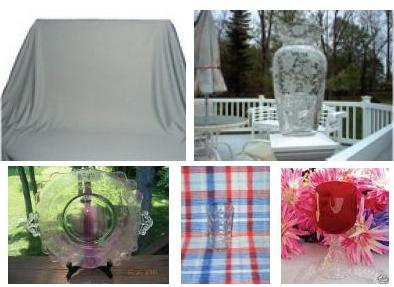
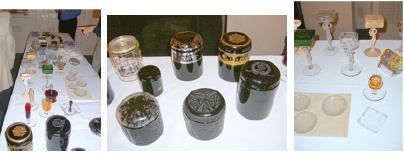
2. No crazy backgrounds – do not use backgrounds that contain bricks, tiles, doilies, checkered tablecloth – focus on the glass. (Obtaining a good glass photo can be easy if you are willing to make a small investment in a good background cloth. The cloth should be a solid color, slightly darker than medium gray. This works great and helps prevent the camera from making a false reading which is possible with a solid black or white cloth. We have found if you go to a good fabric store and ask for a fabric that won't wrinkle, it makes it even better.) You do not need anything fancy to take good photos. (see a good photo set-up, first photo, top left)
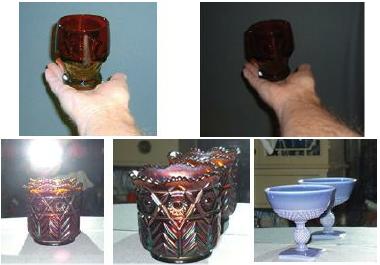
3. Do not take glass photos with someone holding the glass. (You are better off purchasing some plastic plate racks or taking the photo of the item flat on the table.)
4. Be aware of that large mirror or window behind your subject. If you use a flash it will flare back and you won't see the glass. This is also true when taking photos of groups of people. (If you can't move the item and you have to take it in front of a mirror or window, take it at an angle. This way, the flash will hit the item and mirror or glass and bounce away from the camera, not back to the camera. This takes practice and you might take several photos all at different angles. Remember, all these are costing you is a little bit of time.)
5. Don't take a photo at a downward angle or looking down
on the glass; take it level or just slightly above level. (Taking
a photo of a piece of glass from above, looking down tends to
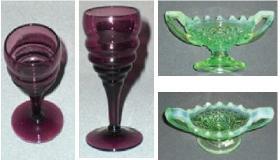 shrink the item. It looks stubby and not as tall as it is. If you
must take it from above, try to place the item at the same angle
as you are above it.)
shrink the item. It looks stubby and not as tall as it is. If you
must take it from above, try to place the item at the same angle
as you are above it.)
6. Be aware of yellow lighting, it will change the color of the glass and people will appear to have an illness. (Most of the new digital cameras will allow you to adjust the camera based on what type of lighting you are using or have around you. Fluorescents are one of the worst offenders. If you have a choice and are taking photos in your home, natural daylight on an overcast day creates the best color rendition but if you are using an artificial light source, a 500 or 1000 watt bulb with a 3200k rating will do just as well. Be sure to turn off your flash and all other lights and set your camera for "tungsten." It is also best to use some type of reflector. Do not shine the light on the glass item to be photographed rather bounce the light from the wall or ceiling, or if you have one, use a photographic umbrella.)
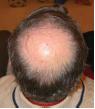
 7. Try not to take photos of the back of
people's heads. Most of our male friends
are in some stage of follicle regression
and I don't think they like it "exposed"
to everyone. (What can be said, don't do it)
7. Try not to take photos of the back of
people's heads. Most of our male friends
are in some stage of follicle regression
and I don't think they like it "exposed"
to everyone. (What can be said, don't do it)
8. Don't take a photo of glass on a table looking from one end to the other. It is impossible to see all the glass. Break up the subject and take several photos, it works much better. (Long photos are OK for a reference point but if you are trying to show items, individual photos work best.)
 9. Prior to emailing, reduce the size of each photo not to exceed
900 KB (something less than 1mb). Sending large files eats
up space and takes time to receive. – (If given a choice when
you save a photo, save it in JPG .jpg )
9. Prior to emailing, reduce the size of each photo not to exceed
900 KB (something less than 1mb). Sending large files eats
up space and takes time to receive. – (If given a choice when
you save a photo, save it in JPG .jpg )
= = = = = = = = = = = = = = = = = = = = = = = = = = = =
With a new camera usually comes a new photo program. Some of these are really good and some of them require a lot of training to use correctly. A free program I have been using for several years is from Google and called Picasa. It is easy to use and allows you to fix your photos. You can crop, straighten, lighten and many other things. Take a look at this photo of Lynn -– The first one is dark and you have a hard time seeing what is going on. Using Picasa I can crop the photo, make it lighter and add contrast to the photo. With this simple program there is no excuse for bad photos. You can get your copy by going to picasa.google.com/intl/en/